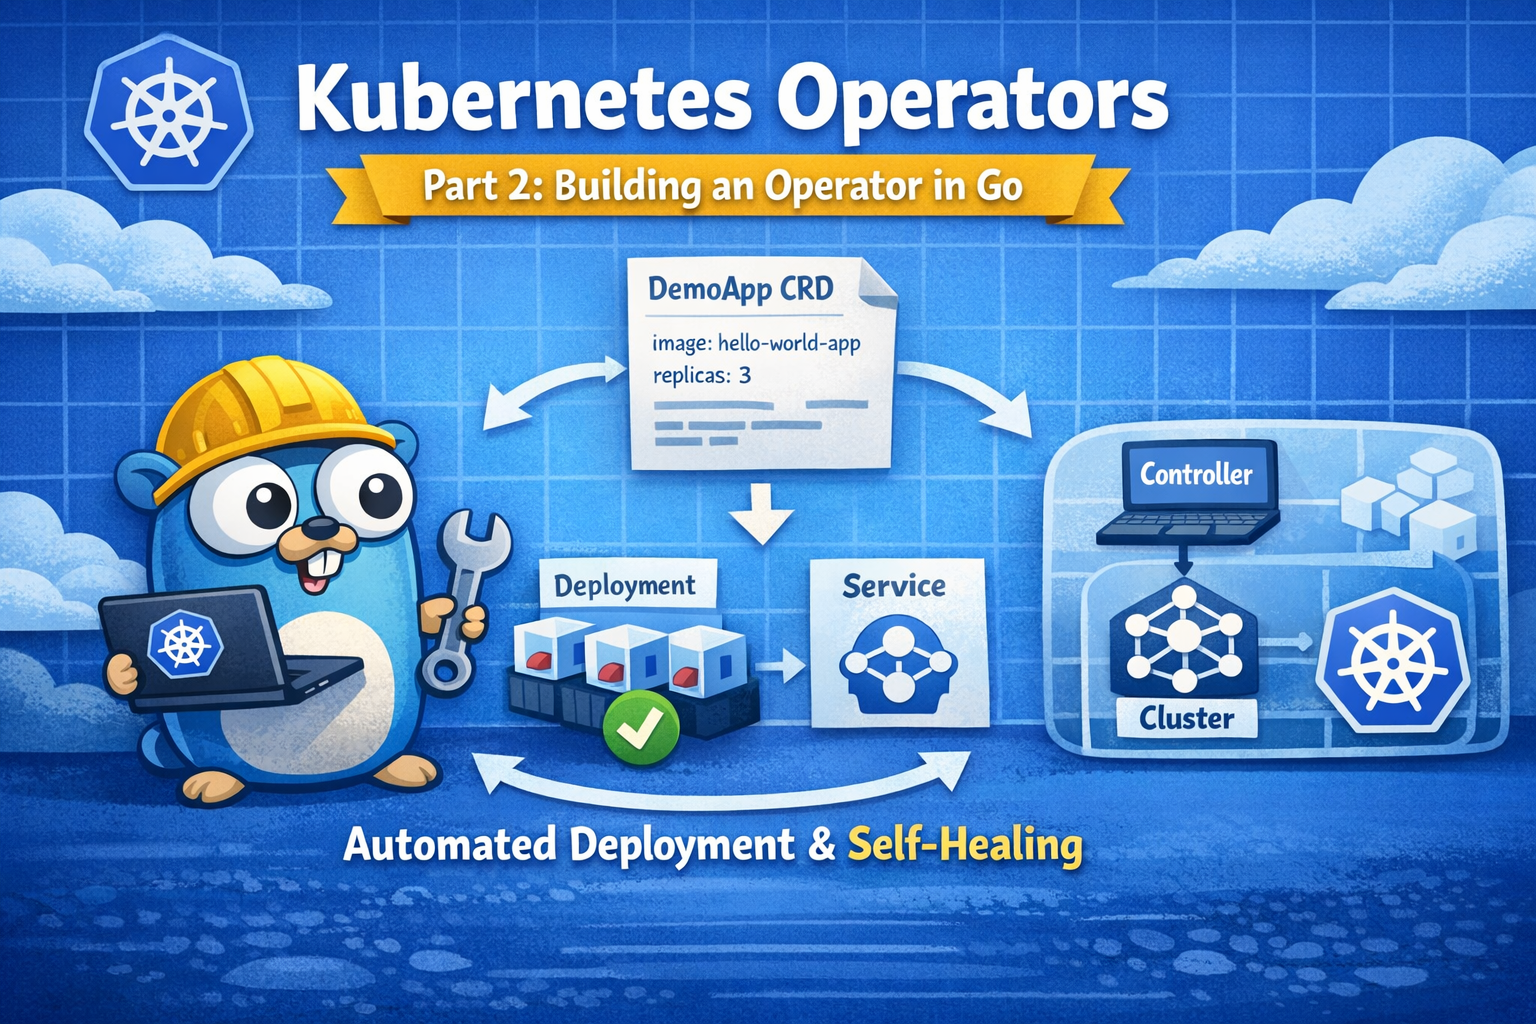
Kubernetes Operators Part 2: Hello World demo app
Welcome to part 2 of this little series on Kubernetes operators :) In part 1 we looked at the theory - what operators are, how CRDs and reconciliation work, and some best practices. This time, we are going to get our hands dirty and actually build a tiny operator in Go.
Our goal: an operator that can deploy a very simple Hello World app for us. When we create a custom resource, the operator should:
- create a Deployment running our container image
- create a Service to expose it inside the cluster
- keep things in sync - if someone deletes the Deployment, it comes back
We will use Kubebuilder, which is the de facto standard toolkit for building operators in Go. Given that the codebase becomes quite substantial even for a simple app, the following is just an overview of what needs to be done. To dig deeper into the code and features, have a look at this repo containing the demo code .
Bootstrapping the project with Kubebuilder
First step: install Kubebuilder. The exact installation steps depend on your OS, but once the binary is on your PATH you should be able to run:
kubebuilder version
With that in place, we can launch a new operator project with
kubebuilder init --domain demo.local --repo operator
What this command does:
- creates a Go module and basic folder structure
- generates a
main.gothat starts a controller manager - adds a
Makefile,Dockerfileand some helper scripts
It does not talk to any cluster yet and does not push anything anywhere - it is purely local basics.
Next, we create the API type and controller for our demo app:
kubebuilder create api \
  --group apps \
  --version v1alpha1 \
  --kind DemoApp \
  --resource \
  --controller
This does two important things:
- adds Go types for a
DemoAppcustom resource - generates a controller (reconciler) that will watch
DemoAppobjects
From now on, we have two key files to work with:
api/v1alpha1/demoapp_types.go– the CRD definition (what fields aDemoApphas)internal/controller/demoapp_controller.go– the reconciliation logic (what happens when aDemoAppis created/changed/deleted)
Defining the DemoApp API
Let’s start with the API. In demoapp_types.go we describe what a DemoApp should look like – basically the spec our users can configure and the status our operator will report.
For a minimal Hello World operator, the spec might contain:
image– which container image to deploy (e.g.vtrhh/hello-world-app)replicas– how many instances should runport– which port the app listens on inside the container
A corresponding YAML for a DemoApp instance could look like this:
apiVersion: apps.demo.local/v1alpha1
kind: DemoApp
metadata:
  name: my-app
spec:
  image: "vtrhh/hello-world-app"
  replicas: 3
  port: 3000
Once the CRD is generated and applied, we will be able to do things like:
kubectl get demoapps
just like we can kubectl get pods.
Writing the reconciliation logic
Now for the interesting part: the controller. In demoapp_controller.go we tell Kubernetes what should actually happen when a DemoApp exists.
For each DemoApp, the reconciler will:
- read the desired state from the
DemoAppspec (image, replicas, port) - create or update a
Deploymentwith that image and replica count - create or update a
Servicethat exposes the Deployment inside the cluster - set owner references so that the Deployment and Service belong to the
DemoApp
If someone deletes the Deployment manually, the next reconcile run will notice that it is missing and recreate it. That is the self‑healing behaviour we want from an operator.
Generating manifests and building
Kubebuilder gives us Make targets for all the boilerplate tasks. A typical flow looks like this:
# Generate CRDs and RBAC from our Go types and markers
make manifests

# Generate client code, deep‑copy methods, etc.
make generate

# Build the operator binary
make build
After this, our operator is compiled and the Kubernetes manifests (CRD, RBAC, etc.) are up to date.
At this point we have:
- a CRD for
DemoApp(generated YAML underconfig/crd/) - a controller that can reconcile
DemoAppinstances - a Deployment manifest for the operator itself (
config/manager/) - a sample
DemoAppresource (config/samples/apps_v1alpha1_demoapp.yaml)
Folder structure – what lives where
Before really playing around with our operator, let’s have a quick look at a Kubebuilder project — which can feel like a lot of files at first — but especially in the very beginning, only a few of them are immediately relevant.
Our Go code (what we will edit regularly):
api/v1alpha1/– our CRD type definitions. Go structs that define what aDemoApplooks like (spec, status, validation markers).internal/controller/– our reconciler logic. This is the heart of the operator.cmd/main.go– entrypoint that wires everything together and starts the manager.
Configuration (Kubernetes manifests):
config/crd/– generated CRD YAML. Do not edit by hand; regenerate viamake manifests.config/rbac/– RBAC rules the operator needs in the cluster.config/manager/– the Deployment used to run the operator inside the cluster.config/samples/– example custom resources you cankubectl apply.config/default/– Kustomize overlay that ties all of this together for deployment.
Build & tooling:
Makefile– build and helper commands (make build,make run,make install, …).Dockerfile– how to build the operator image.go.mod/go.sum– your Go dependencies.
This structure might look a bit heavy for a tiny demo, but the upside is that it is the standard layout used by most real‑world operators – so what you learn here transfers nicely.
Let the fun begin: Running the operator locally
Before deploying the operator into the cluster, we can try it out locally.
Install the CRD into our cluster:
make installThis applies the generated CRD YAML to our current Kubernetes context.
(Optional) Check that the CRD is there:
kubectl get crd demoapps.apps.demo.localStart the operator locally:
make runThis runs the Go binary on our machine, but it watches and reconciles real resources in the cluster.
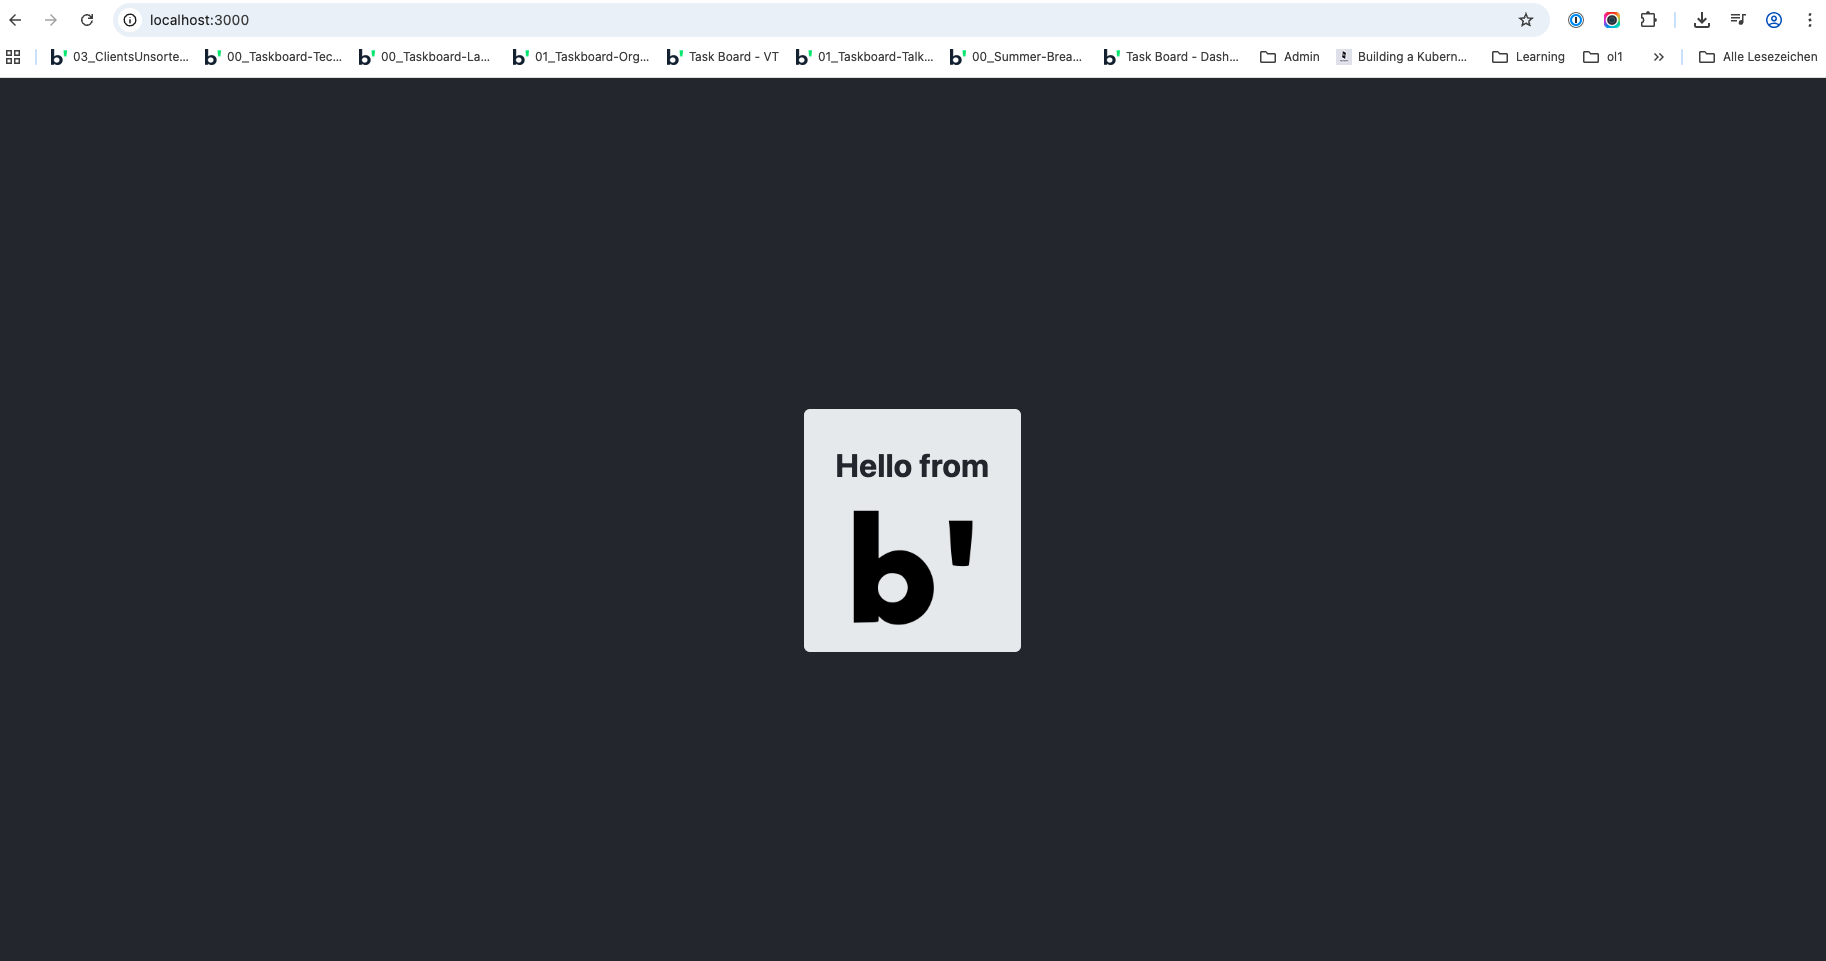
In another terminal, we can create a sample
DemoApp:kubectl apply -f config/samples/apps_v1alpha1_demoapp.yamlThen we can inspect what happened:
kubectl get demoapps
kubectl get deployments
kubectl get services
We can see a Deployment and a Service that belong to our DemoApp. Port-forwarding our pod gives us:
Running the operator inside the cluster
That was fun, but in a real setup, operators run inside the cluster as a Deployment. So that’s exactly what we’ll do next. For the sake of simplicity, we will just run commands for now and not create a separate Deployment YAML for the operator:
Build a container image for the operator:
docker build -t demoapp-operator:latest .Deploy the operator to the cluster with the prebuilt make step:
make deploy IMG=demoapp-operator:latest
And there we go - the operator runs as a pod in the cluster, watches DemoApp resources, and reconciles them continuously. 🚀
Deploying new instances via curl
As we now have our operator up and running, why not try adding instances via curl. The easiest way for the beginning is using kubectl proxy, which exposes the Kubernetes API on localhost.
So while running
kubectl proxy
in one terminal, we can use a second terminal and run the following curl command:
curl -X POST http://localhost:8001/apis/apps.demo.local/v1alpha1/namespaces/default/demoapps \
  -H "Content-Type: application/json" \
  -d '{
    "apiVersion": "apps.demo.local/v1alpha1",
    "kind": "DemoApp",
    "metadata": { "name": "curl-app" },
    "spec": {
      "image": "vtrhh/hello-world-app",
      "replicas": 1,
      "port": 3000
    }
  }'
And there we go - we have a new Hello World instance in our cluster. 🎉
Summing up
So, we now have a very simple Kubernetes operator deploying a basic Hello World application in our cluster :) That’s a great starting point demonstrating the core idea: encode your operational knowledge once, and let Kubernetes execute it for you over and over again.
We could now build on top of this basic application, e.g. by adding status fields or additional operations, but that might be a bit much for a simple demo app. The end goal of this blog series is building an operator for a more complex application - Nextcloud. But before going that deep, let’s have one step in between: deploy a simple, but still the godfather of all demo applications - a to-do app. How? Stay tuned for part 3 :)
header image created by buddy ChatGPT